LLAMA CUSTOM TUTORIALS
Marvel Legends
Silver Surfer
Re-release Mod
"Correcting the mistakes of the factory"
|
|

Concept Phase
There are a
number of issues that the Surfer figure has that keeps him from
being as great as he could be. Those problems are easily fixed
without too much effort, which is why this is just a mod and not a
full blown custom. Even still simple changes to a figure can
do wonders in making your collection shine. This Surfer
will be adjusted to closer resemble his movie counterpart. His
four issues are: head sculpt, shoulder placement, paint job, and
board. I'll go through each of these in turn.

|
|
|
Construction
Phase
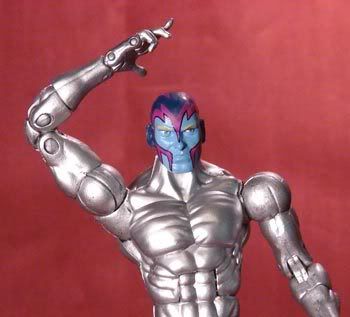
First off let's tackle the
horrible head sculpt. The character has long since shed this
look, what he needs is
a more human face. Enter
Archangel. I had an extra head sitting around and he was
perfect as he doesn't have
any hair to sand away or unique
features. And yes he has ears but so did the
movie Surfer, so deal.
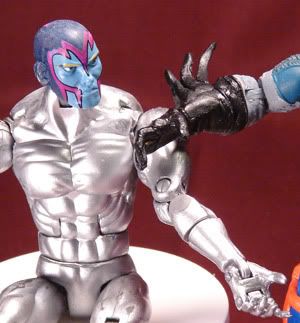
Next you can plainly see that his shoulders are
awkward at best. This is because of
his lateral joint that
allows him to adjust the ball shoulder joint he has. The
factory
didn't construct it to allow the joint to sink deep
enough, therefore...
awkwardness.
---------------------------------------------------------------------------------------------------------------------------------------------
|
|
|

 |
The fix is actually
a quite simple one.
First, you need to crack open that torso.
The easiest
way to accomplish this is to have a small slot
screwdriver
on hand and wedge it into his armpit area.
Gently wiggle
back and forth until you hear a nice crack.
This is the
loosening of the glue that holds the two halves
together.
Now make sure to go to the other side and gently
get
another "crack" If you attempt to open the torso from
only one area you will greatly chance breaking the
inner
pins and maybe more. After getting the two
cracks there
should be a gap that you can run the screw
driver down and
carefully wedge the two apart.
Once inside you can see just how hollow the guy
is.
Take the arm (lat joint and all) off the peg and
prepare
your dremel for a little sanding. You want to
remove
the area where the lat joint was rubbing against.
But to
be able to test that well you must fix the lat joint
first.
They made them too large and they don't sink in far
enough. Dremelling off the square tip of the joint will
allow it to swivel further inside the body and thus
allow
the shoulders to take a more natural position
down along his
sides. Don't go too crazy. Remember
the lat joint also
houses the peg for the shoulder
ball joint. Also make sure
to not damage the hole that
the peg will go through or you will
have a loose or
damaged joint
that is nearly impossible to fix.
This will go a
long way to fixing the shoulder , but that
isn't the only thing
that needs dremelled down. |
|

Now is the time to dremel down those arm
pit areas. You are just
shaving off about a
millimeter off of the inside arc. Be very
careful of
the peg holes on the back and the pegs themselves on
the
front. As long as you avoid those don't worry about going a
little crazy on the rest because we can always fill the
extra gaps
with Apoxie Sculpt. Once you are happy
with your dry fit, place
the lat
joints back where they belong (do make sure  to match the to match the
left and
right arms up)
Dab some super glue on
the
pegs and along the
sides being careful to
avoid
the joints.
Remember a thin coat will
dry
faster and hold
better than a thick one.
Now push the two halves
together and press down
for about half a minute to ensure the tightest bond.
You can now see how shoulders should look on a
figure.
-------------------------------------------------------------------------------------------------------------------- |
|
|
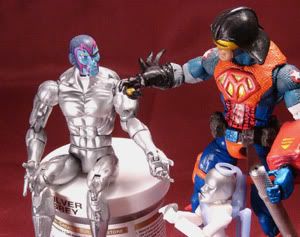
 Now we've taken care of the head and
shoulders , construction phase for the figure itself is complete.
Now we must... Now we've taken care of the head and
shoulders , construction phase for the figure itself is complete.
Now we must...
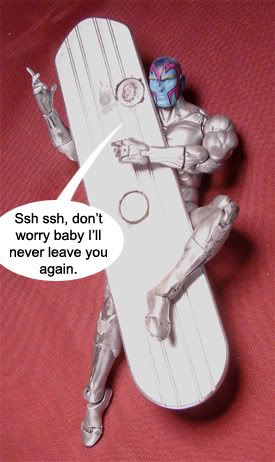
Hold on a
second.
...
...
...
...
...
...
...
...
...
...
...
Annoying
little punk |

|
|
---------------------------------------------------------------------------------------------------------------------------------------------
 Clay
Phase Clay
Phase
Obviously, the
clay phase is all about the sculpting. You are saying to
yourself (I bet) that I'm just modding a Surfer into a Surfer what
the heck am I sculpting?
Ah we shall get to that in a second, but
first we must prepare the "clay" in this case we are going to use
Apoxie Sculpt. This
awesome product allows me to sculpt
fine detail work and
is very sturdy once cured. You have
about 2 to 3 hours to use it
so that is plenty of time as long
as you don't make too much at
a time. It is a two-part air
drying epoxy that can be smoothed
with water or oil.
Today I'll be
using my Silver/grey apoxie. It should be obvious why.
The
most important part of using this stuff is proper mixing. Too
much of either part will cause the clay to be too weak or too
brittle. It is also very very important to make very small
amounts at a time. You'll be surprised at how little you need
at times. Remember you can always mix up a little more but you
can't unmix excess apoxie.
First off make two
small spheres of approximately the same
size. |
|
Let's
begin the twisting....

a little more, almost there

Completely
integrated
|
|
---------------------------------------------------------------------------
You can begin using this right away. But
the heat from your fingers will more than likely leave it very
sticky and difficult to work with, especially for detail work.
Letting it cool for a few minutes will do wonders. You have
around 3 hours to use it so a couple minutes won't kill
you.

|
--------------------------------------------------------------------
 As to what we are doing, sculpting on the
Surfer, well part of what happens to a figure when it is made
articulated is that the original sculpt is compromised. Holes
are poked here and there to allow for pegs which allow for
movement. The mass production process does not easily allow
for these joints to be less noticeable. That is where we, the
humble customizer shall step in.
|
|
|
 --------------------------------------------------------------------------------------------------------------------------------------------- ---------------------------------------------------------------------------------------------------------------------------------------------
Push
a small ball of clay into the "peg pit" This won't stop
the
peg movement
at all. Just fill in the hole and smooth over
the
whole  thing with a finger thing with a finger
dipped in water.
Now you can see the
difference. Make sure
to get all of them.
This
works best for pin
joints, it is an
optional
step but it is these
little touches
that will
help make the figure
move "beyond a
kid's toy"
|
|
---------------------------------------------------------------------------------------------------------------------------------------------

Once
you have your figure smoothed out it is
time to focus on his big
accessory and bigger
disappointment with the original
figure....
His
surfboard.
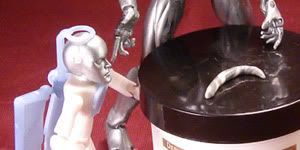
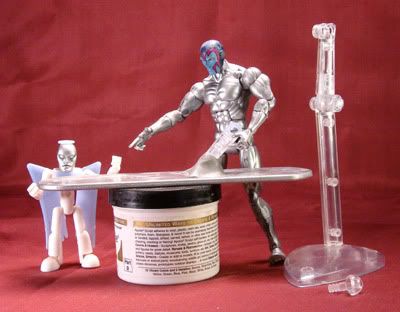
First you'll want to find some strong magnets.
Rare Earth magnets are the best by far for their cost and
size. Just do a little eBay searching and you can find
some great deals. I filled the peg holes in the figure's feet
with two small
disc magnets (make sure to match those
polarities. You will want them right on the surface so do not
cover them with clay, only around them. A thin
layer of superglue will hold them down. Make
sure the feet are cured and the magnets are secure before going onto
the board
(it will make the whole process a much less
frustrating one if you do)
Now with the board I went with
larger discs to give him some options
of where to stand. I
placed the magnets closer together as the pegs
were so far apart
he had to do the splits all the time. You could go
crazy
and put up to 8 of these guys on the board but I stuck with
only
two for now. Again you want these guys flush with the top
surface of the board. Super glue those suckers in place
(again extra check those polarities) In fact, just make your life
easier and ensure
that the polarites for the feet are all the
same and the board's are
opposite polarity of the feet. This
will help not restrict your poses later. |
|
|
------------------------------------------------------------
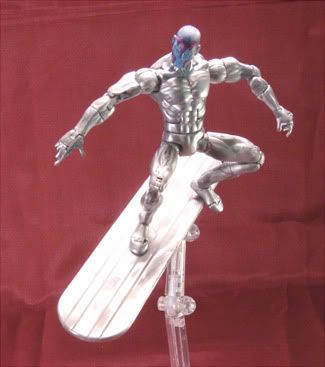
Now you can see that he can stand naturally on the
board and the magnets hold him fine. They are even strong
enough to hold him upside down.

|
----------------------------------------------------------------------------------
A last bit of "Matt-gyvering" will be getting
that board airborne. Take an old ML flight stand and remove
the top joint (unscrew it) Now glob some Apoxie sculpt at
the center of balance for the board, poke the top joint into
the stuff and smooth it out. Make sure there is plenty as it
has to hold the figure and the board
|
|
--------------------------------------------------------------
With
that cured you can reattach the flight
stand and you have a
board worth riding on.
And you can't tell in the pictures,
but I also
filled in the lines on the board with sculpt and
sanded them smooth once cured. The movie
surfer's
board was smooth as silk, plus it
helps hide the magnets that were
added.
|
-----------------------------------------------------------------
Coating
Phase:
And now is the time for
paint. I used an automotive
chrome spray paint. It
was designed to paint trim and
details so it works for
plastics. Make sure to use chrome
to get this awesome
mirrored effect. Remember many
thin coats are better than
one thick one.
Just see the difference.

|
|
|
Make sure to
get those joints as well. It is best to tape off the flight
stand when painting the board. If you sanded it really smooth
you should get a nice mirrored effect.
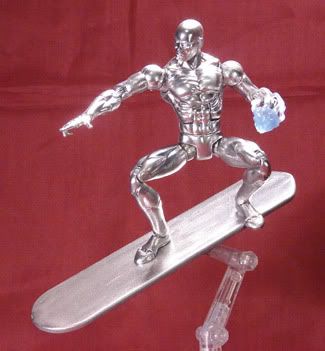
Completion
Phase:
Do a double check of the joints
and all the angles. There really isn't much left to do with
this guy. He shouldn't need a sealer for the paint as that
will just ruin the chrome finish anyway. I also had an extra
energy accessory in my fodder box which looks awesome with the
surfer.
While this was not the hardest mod I've ever done he was by far
not the easiest. With no details to hide behind every bit of
his sculpt had to be smoothed and near perfect.
But I believe I pulled off the naked silver space
dude on a
surfboard pretty good.
Matt Ashbaugh
7/14/07
|
|
|
DC Comics images copyright 2006 DC Comics or Respective Owner. Marvel images copyright 2006 Marvel Entertainment or Respective Owner.
All other images copyright 2006 Respective Owners.