LLAMA CUSTOM TUTORIALS

HARLEY QUINN

Tutorial Covering the Five C's of Customing  

"Creation of an articulated Harley Quinn from start to finish."


Be careful what you wish for.

One minute I'm wishing that my Harley Quinn had better articulation and the next she is hurdling down towards the
ground because she was made in such a way that she can
barely stay upright.  Her arm snapped right at the joint.  At
first I was upset.  But me being upset that an action figure broke
is like a mechanic being upset that his oil needs changed.


Concept Phase

I had an extra ML Wasp sitting around that is just
the right build  for a Harley.  Tons of double joints
and ball joints for a high level of options in posing. 
The only downfall of this figure for easy customizing
is her wings.  Nothing I can't work around though.

The Harley has some pros as well.
  Her face is just adorable and
her hands are molded to perfectly
hold on to her accessories. 

 
Construction Phase
So the best thing to do is remove those pieces I want from the DC Direct figure.  Carefully using a dremel remove the hands and neck of the figure.  You'll want to keep her wrist ruffles intact, also make sure to get the whole neck so you don't damage the joint.


*Do be incredibly careful with
the dremel.  It is a powerful
tool and if it can chop through
plastic like a hot knife through
butter think of what it will do
to your fingers *

As long as you have your dremel
out now is as good a time as any
to remove the Wasp's head as well. 
Again make sure to get that whole
neck. The reasons for this will
all be clear soon. 


Now it is time to remove those wasp wings.  Now these are nicely done. I want
to save them for later use.  So the easiest way to do this is with one hand firmly
hold on to her arms and with a pair of needle nose pliers grip on the wings.
Now just pull her apart.  Yeah go ahead and be tough with her no
way you  are breaking her in anyway you can't fix this way.


See?  Those three tiny pegs holding her chest
together gave before anything else


See those metal pins?  They are why
her wings are so tough to remove

Using those needle nose again grab the metal pin and jiggle the
wing at the joint.  The metal will separate from plastic or more
likely it will snap.  Either way I can use these for a future figure.
  Tossed them in a ziploc bag and tossed that into my parts box.

Now is the time we put her back together.
  I put a dab of Fixit Sculpt in the cavity. 
Keeping it away from the joints.  I also
put some small dots of super glue on
the pegs just for insurance

Now you could hold this figure for the 4 hours it takes to
cure the fixit sculpt.  Or you can do what I did and find a
cheap clamp to hold the figure for you.  I like this one
because it has rubber over the teeth so it doesn't
damage the figure, plus it can go anywhere so I can
store it away when not using it.  Nice for ten bucks.

While she is pulling herself together you can
prepare the next step.  To be able to easily
attach the hands it helps to have some extra
pegs.  Back when the first Fantastic Four
movie came out there was a Mr Fantastic
figure that had extra pieces that allowed him
to "grow".  He sold poorly and went on
clearance, so I have many and the extra
parts are filling my parts box.  Simply cut out
peg and holder from four of his parts.  Make sure
the pegs are all the same size or this won't work.
You will get at least four same sized pegs from
a single figure so no need to buy multiple.

First you will need to chop off wasp's hands below her
wrist.  Then you will want to drill a small hold into her hand
so that you can attach the back of the peg.  Now notice
the length of the rubber peg holder.  You want to chop
off her lower arm to match that length.

Dryfit (making sure the peg fits before gluing) a few times and dremel a bit here and there until it is perfect.  It helps to focus on only one arm first so you can use the other to match the length.  Once you got it a dab of superglue on the rubber pegholder will hold it in place.  Make sure not to glue the pegholder with the peg in it or you will be sorry. 

Now for the alternate head.  Since the actual neck joint is in the head we don't want to use a moving peg for this.  I took a square dowel rod and glued it to the neck of each head.  Then cut it to size and used my dremel to make it pointed for easy entry.  Then I drilled a hole into the neck of the body and dry fit it until they both fit easily.  Then I put some Apoxie sculpt around the hole.  Got the wooden spikes wet and put them in the neck hole then pulled it out.  Let this cure for about an hour and now that the clay is firmer you can re-wet and make sure the hole is perfect for both pegs.  Now you can let it cure fully.


Clay Phase 

Now is the long and enjoyable (for me anyway) process of sculpting the figure.  First off you will want to fill the wing
holes in the back of the Wasp.  Then you'll want to go about smoothing out the lower arms you added the pegs into. 

You don't have to but I also gave her a bit more of a
"ghetto booty".  Joker has to keep her around for some
reason.  The different colors are because I ran out of the
White and had to finish in grey.

Just a few close ups of other sculpting details.

One tip to make things easier is to keep a small bowl of water near by when sculpting.  Making sure your fingers and tools are wet will keep the clay on the figure and not your hands.

Here she is all finished on the sculpting end.  The neck thing she wears is difficult to sculpt over the shoulders so I cut a couple circles of craft foam out and glued it to her chest area.  Then I could sculpt over it without worrying about the joints getting hit with clay. 

The boxing glove was added as it is kind of a trademark of hers.
  Once you are totally happy with the sculpting (sanding
anything you want smoother) it is time for the paint.

 
Coating Phase

Construction is the skeleton, sculpting is the organs, so painting is the skin and clothes.  It is 90% of what someone will judge a custom by. 

For the base coats I like to use automotive spray paint.  It is cheap, dries fast on plastic, and is tough once done.  You will want to vent the area as there will be fumes.  I first sprayed the red as it is a million times easier to paint black over red than red over black.  You will notice that I focused the painting on only the parts of her costume that will end up red.  I didn't worry about getting it anywhere it didn't need to be.  Also don't forget to put her right hand (the one that is supposed to end up red) on the left arm as that will be red as well.

Once you are happy with the red the easiest thing to do is to start hand painting the black.  It will quickly and easily cover the red and since the base figure was mostly black you don't have to worry about the joints on those sections.

Now that her base coat is done we can get more into
the details.  The next major thing to paint would be her
neck ... flair... thing.  Carefully paint it without getting
it on the already painted sections.  Her wrist ruffles will
be next and it is easiest to paint then when they are not
attached to her arms. 

Chances are you are going to be using white clay, but
since I had to use grey I also painted her hair white so
that the yellow would cover easier. 

Slowly add the details.  There is no need to rush this.
I matched her wrist ruffles to the factory figure.  A light blue alternating over the white.  For the line I actually used a super thin permanent marker to draw the line.  That is the same thing I used to add the black diamonds, though I did have to hand paint the red diamonds on. 

Just take your time and hold on to the original figure's body for comparison.  Actually you should never throw extra pieces away.  You never know when you might need a piece. 

The boxing glove was painted along with the base coat but I did a little dry brushing with the lighter red to give it texture. The glove is removeable.  I have a magnet in the gun and on the glove so I could remove it if I wanted to.  Just an extra touch.

 The mallet was painted a darker brown for the main head and a lighter brown for its "worn away" sections on the ends. 


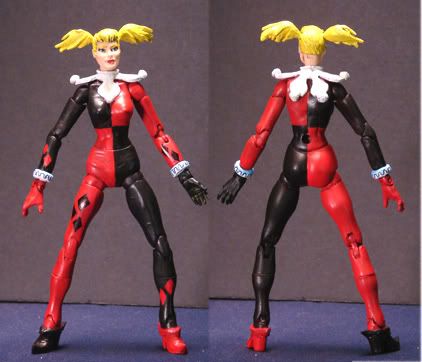
Now all that is left is the little 
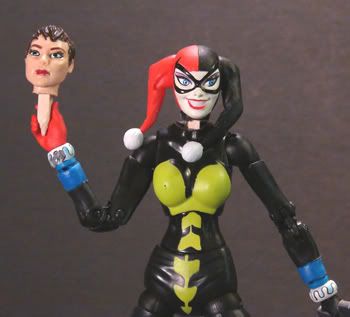
touches.  A few coats of yellow gave Harley her blonde hair.  As long as you can keep any paint off her face you won't have to repaint any of it. 

Completion Phase

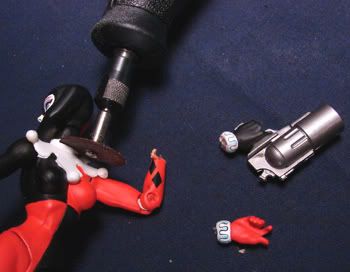
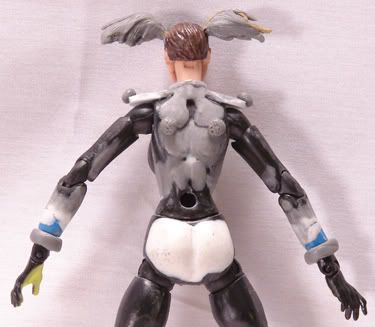
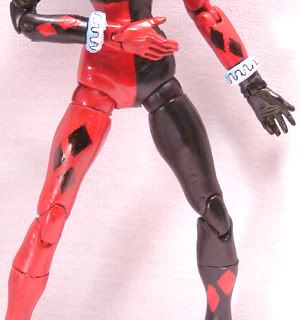
This is also the time to check the paint rub sections.  Basically move the joints and check for anywhere (mostly the red) where the paint is getting rubbed off.  This is the number one most challenging part of the painting process. 

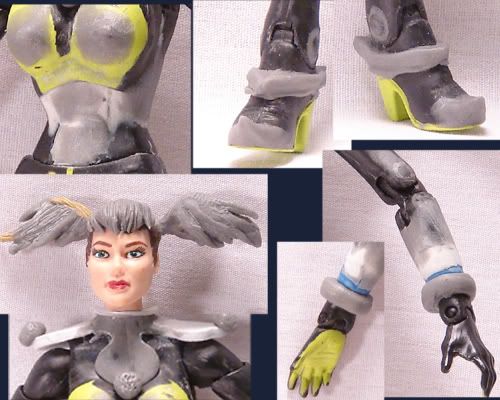
With the automotive paint I was able to lay down a thin layer that isn't getting chipped off.  There was a bit at her hip that I missed.  Just lay down a light layer of paint by hand and let it dry.  Test it and if it happens again, lay down the paint again, let it dry very well
(leave it for an hour or more)

Superglue will form a shield that will help stop the paint rub.  The hard part is keeping it out of the joint so you don't glue it in one place.  A way around this is getting the glue that comes with a brush applicator.  Brushing a light coat only over the area you know rubs and letting that harden will go a long way in stopping the dreaded paint rub. 

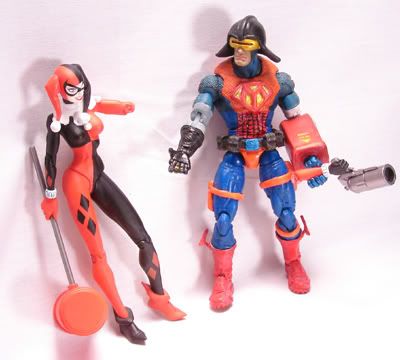
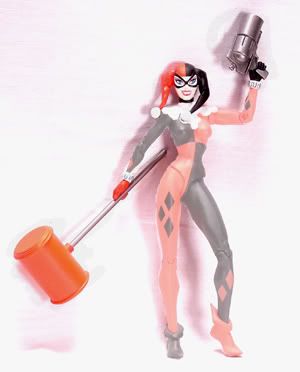
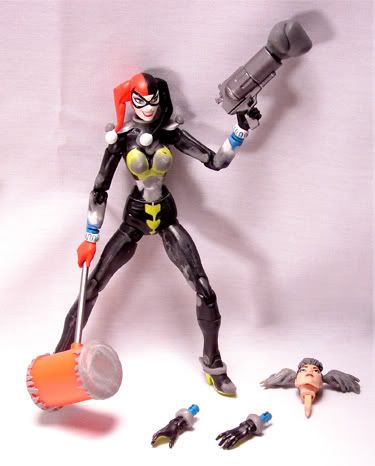
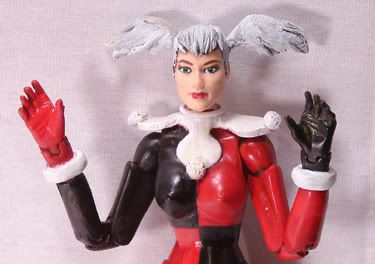
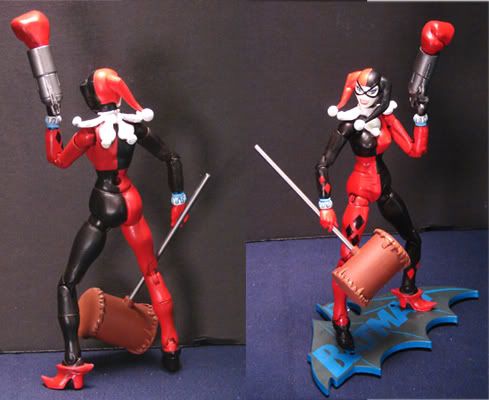
Now look how purdy she is. 

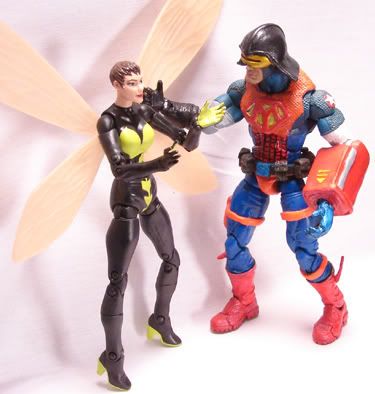
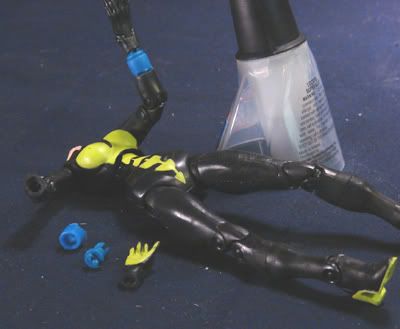
An added bonus is that the Wasp figure comes with holes in her feet that fit the DC Direct base peg.  Like she never fell at all.

Well there you have it.  From disaster to triumph with a little clay, paint, and know how.
With the right base figure anything is possible.

Look at how happy the Joker is to have his Harley Quinn back.  Of course he's always smiling like that so who knows. 

Hope you all enjoyed this journey
toward a better Harley.  Maybe you learned
a few things that will help you in making
a Harley for yourself , or that will aid you
in other customs of your own.

Llama Customs
Matt Ashbaugh
05/04/07---